MTB Tubeless Conversion Guide
If you aren’t running tubeless on your mountain bike, you’re fast becoming a member of a minority group within the mountain biking community. In a world of ever changing wheel sizes, fork axle and hub spacing standards, most mountain bikers can agree on tubeless being a useful piece of technology and not just marketing hype. In this MTB tubeless conversion guide we will cover the different tubeless technologies available, methods for getting a successful seal between tire and rim, and discuss options for converting, from budget to bling.
Tubeless MTB Tires Explained
Before we look at the intricacies of MTB tubeless conversions, let’s quickly cover what tubeless MTB tires are. Tubeless tires have seen quick uptake with mountain bikers rather than road cyclists as they enable mountain bikers to run lower air pressures that help with traction, without running the risk of pinch flats.
Similar to clinchers, the bead on tubeless MTB tires needs to lock in place with the rim, only tubeless tires do so without using an inner tube. Air is inflated directly into the tire rather than a tube, and once sealed with the rim, the system is airtight. Most mountain bikers use sealants to prevent punctures and help with slow leaks. Pinch flats are a thing of the past with tubeless MTB tires, however under hard cornering or a hard hit it is possible to “burp” your tire.
There are three main “technologies” used with tubeless MTB tires:
UST Tubeless
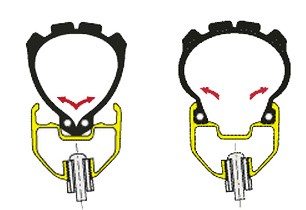
UST stands for Universal Standard Tubeless, a system that was introduced in 1999 and developed by Mavic, Michelin and Hutchinson. UST tubeless rims have hooked edges that are designed to seal with specially designed UST tires.
UST wheels and rims have a square shape bead hook rather than the standard rim’s rounded profile. A “hump” on the edge of the rim bed helps lock the tire bead into place. As with all tubeless rims, UST rims must be airtight, meaning spoke holes must be fully sealed with tape or plastic, or the rim bed is left intact and not drilled at all.
A notable point on the UST tubeless system is that they don’t require sealant. From experience though, slow leaks can be an issue where the tire bead has been tightly folded in packaging or shipping. Sealing a UST tire to a UST rim without sealant is definitely doable, but unless you are racing I question the benefit of tubeless without sealant as sooner or later you will need it.
For more info on UST Tubeless I suggest this excellent piece by Pinkbike.
UST Tubeless System
TLR Tubeless
TLR stands for Tubeless Ready and is Bontrager’s take on the new technology. The TLR tubeless system does away with the chunky square bead that you see on UST tubeless tires and also runs the more traditional thinner sidewalls seen on tires designed for tubes. This means that TLR tires are much lighter than UST tires, however sealant must be used.
Bontrager’s TLR system uses “Super Juice” instead of a latex sealant to seal TLR tires to TLR rims. This “Super Juice” is lighter than a traditional latex sealant making the TLR tubeless system a claimed 90gr lighter on average than a standard UST setup.
TLR Tubeless Ready System
Ghetto MTB Tubeless Conversions / Non-Patented Tubeless Setups
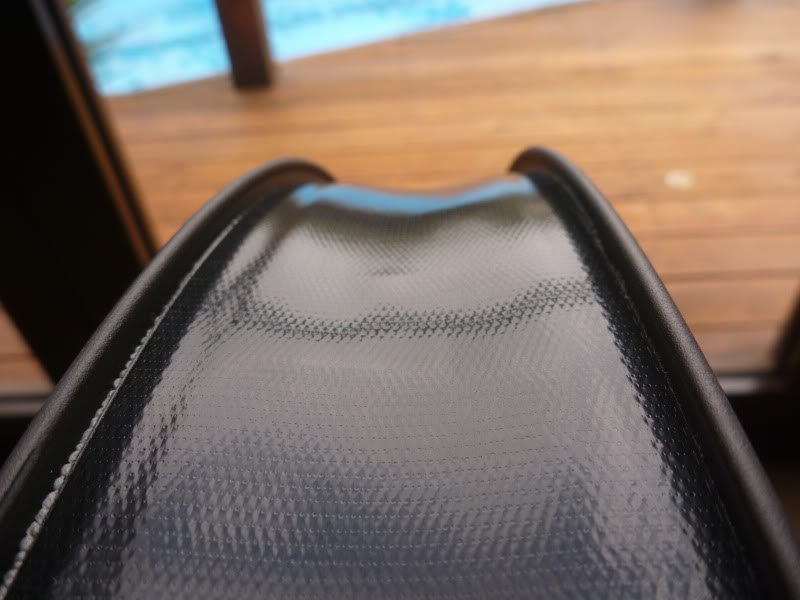
From here it gets a little more complicated. Manufacturers have taken a system that was for the most part created by people who didn’t want to buy into the UST and TLR tubeless systems. The term “ghetto tubeless” refers to conversions that use off the shelf parts to convert rims and tires designed for use with tubes to tubeless.
The traditional ghetto tubeless method involved cutting a 20″ BMX inner tube open and seating the tire bead on top of it. With the use of sealant, the ghetto tubeless conversion method allows a non-UST or TLR tire and rim to be a perfectly good tubeless system. For an excellent guide on what I consider a more “dated” method of tubeless conversion, check out this guide from MTB Techniques.
Ghetto Tubeless Split Tube Method. Photo: buffal0b1ll
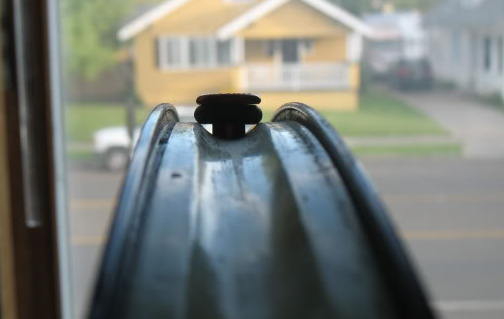
Thankfully though, the MTB industry has begun to perfect rim, tire and valve design so these issues are far less common today then they were 5+ years ago. Furthermore, simple to install and affordable tubeless MTB valves are now available at all price points, meaning a BMX innertube is no longer required. Instead, gorilla tape or another form of rim tape is used to seal up the rim. For more information on the specifics of tubeless valves, see this guide on tubeless valve construction.
Gorilla Tape Tubeless Conversion on a Fat Bike Rim. Note: on a standard rim the gorilla tape will fit tighter. Photo: ozzybmx
The single biggest catch with ghetto tubeless is that results may vary and a little skill on the installer’s behalf goes a long way. Some common issues include:
- One tire may work perfectly on one rim design but cause endless frustration on a different rim design
- Some tires may bleed sealant for weeks before finally becoming fully sealed and reliable
- Some tire/valve/rim combos will be easy to seal using a floor pump, others will require a quick burst of air from a compressor and a litre of soapy water.
MTB Tubeless Conversion Options
From this point on, I’ll disregard both UST and TLR Tubeless systems. If you want to go with either of these systems you will need to buy into the whole kit – wheels, valves, tires and if necessary, sealant. Instead, I’ll focus on converting to tubeless MTB tires for a range of budgets.
Cheap Tubeless Conversion
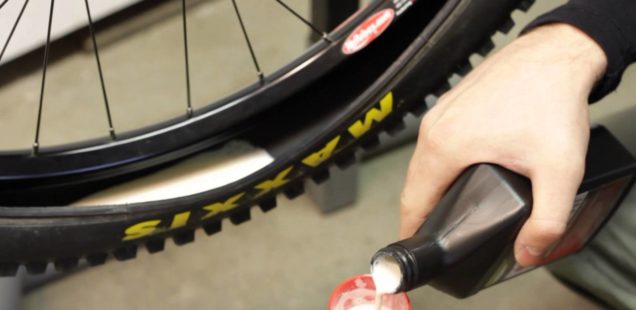
Thankfully, converting to tubeless can be very inexpensive. You probably already have a perfectly good set of wheels and possibly tires, so why get rid of them? For a cheap tubeless conversion, simply purchase a roll of gorilla tape and the following:
Budget Sealant
This list won’t be exhaustive, but the cheapest sealants I’m aware of are:
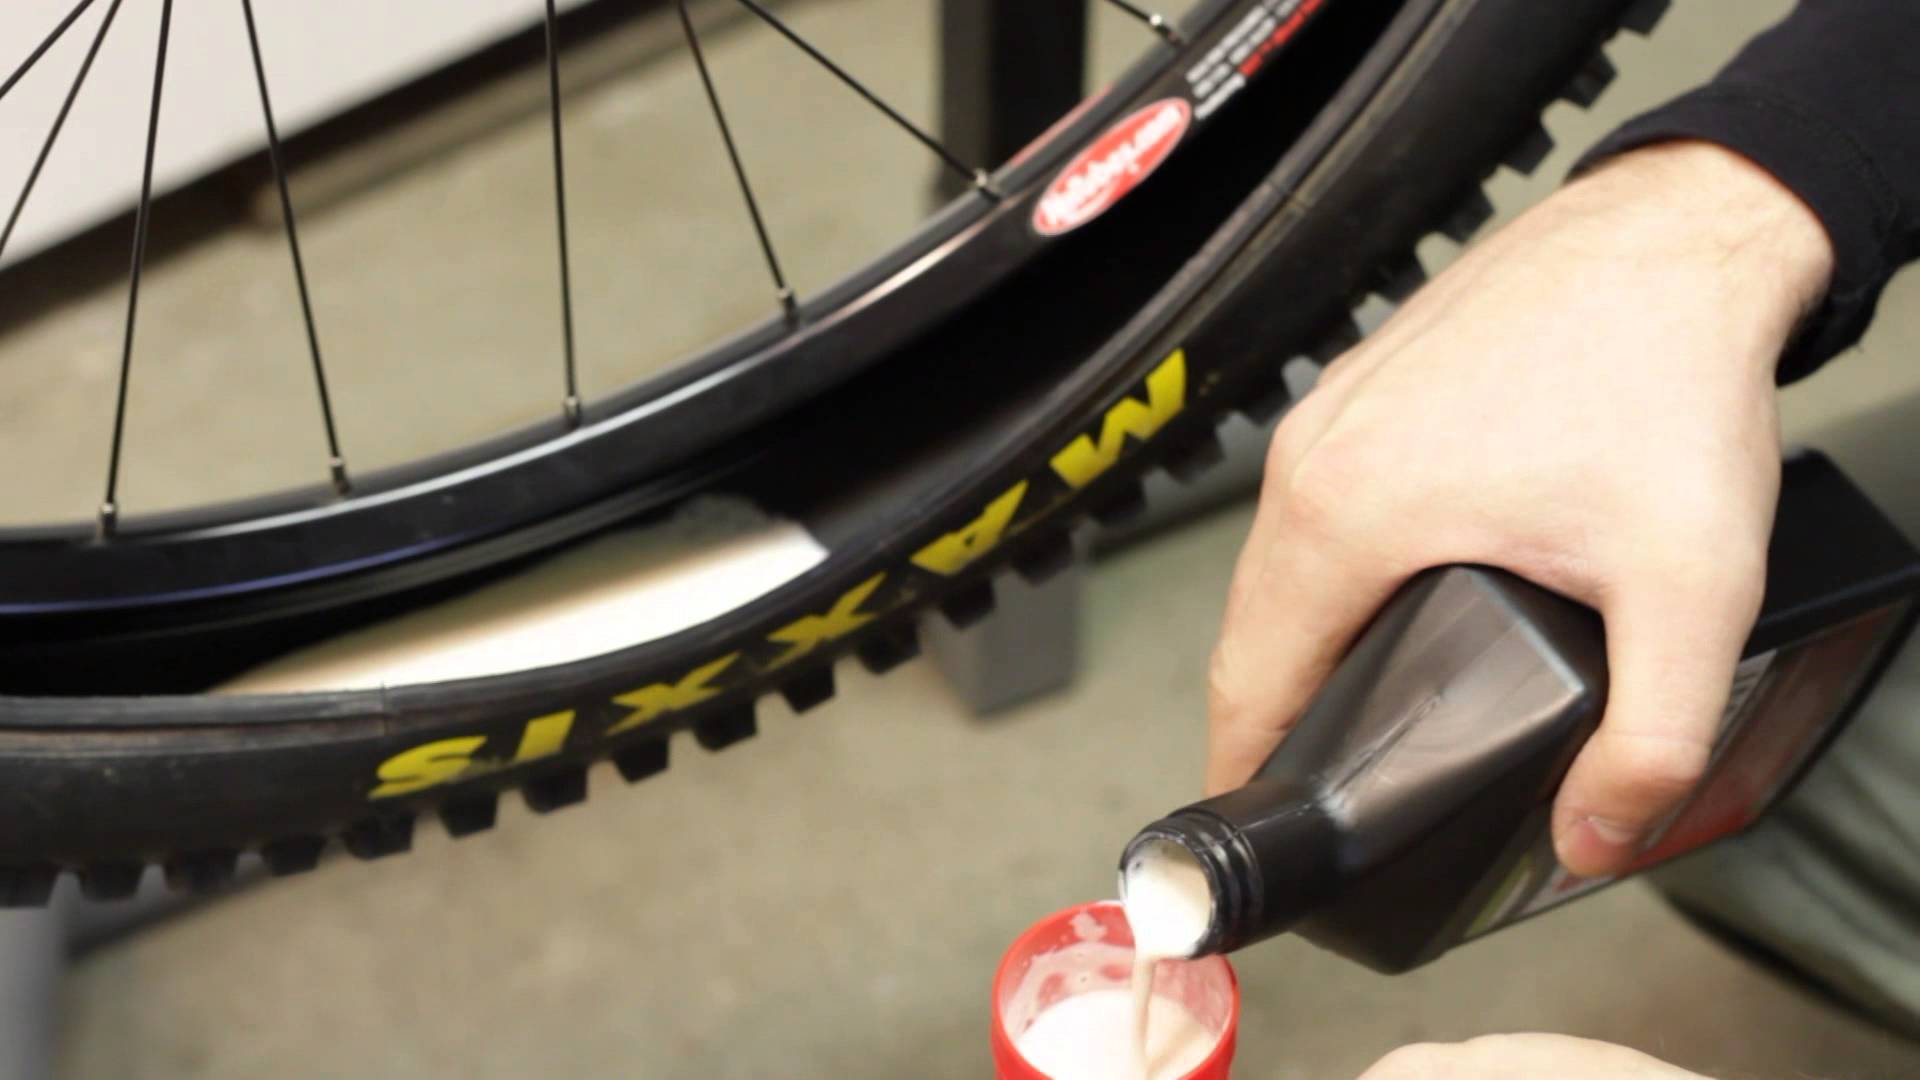
Tubeless Sealant. Photo: Stan’s
Cheap Tubeless Valves
When it comes to tubeless valves, the most important criteria is that they seal to your rim. In years gone by, I have had a lot of luck with valves that have a rectangular UST-style base, though these seem to be going out of fashion nowadays in favour of round base tubeless valves which appear to fit a greater range of rim designs.
If you have a good relationship with your local bike store, ask if they buy their valves in bulk from a supplier. If they do, chances are that’s going to be the cheapest way to get valves.
Failing that, there are plenty of options to buy valves online – just make sure you stick to brass valves which are usually half the price of their lighter, anodized, aluminium counterparts. Here are some popular cheap tubeless valves:
- Orange Seal Tubeless Valves
- Shimano UST Valve Stem (yes, these will work on non-UST rims)
- WTB TCS Presta Valve
- Check eBay! I’d add a link but there are always better deals around.
- Make your own
Best Tubeless Conversion Kit
As with all things cycling, it’s nice to have the lightest, most reliable and best looking kit possible. Thankfully when it comes to tubeless, it’s not very expensive to do this. Weight savings are mostly as a result of being careful with the amount of sealant that you add to your tires, however some sealants are lighter than others. Furthermore, there are some lighter options for rim tape and tubeless valves – we’ll explore them below.
Best Tubeless Rim Tape
If you want the easiest possible conversion to tubeless on your bike, get some rim tape. It saves you the (mild) hassle of cutting down the gorilla tape and will allow for near-insignificant weight savings. Alternate rim tape offerings include:
- American Classic Tubeless Tape
- DT Swiss Tubeless Ready Tape
- Spank Tubeless Rim Tape
- Stan’s NoTubes Tubeless Rim Tape
- Velocity Velotape
Best Tubeless Sealant
Honestly, I’m not sure anyone can be confident in claiming that one sealant is better than another. I have personally only had good experiences with Stan’s Sealant, but many people rave about Caffélatex and other alternatives. Instead I’ll provide a list of some options and you can decide what works best for you.
If you’re embarking on the MTB tubeless conversion journey for the first time – just go with Stan’s or Joe’s sealant. It’s reliable and it works.
Best MTB Tubeless Valves
Similar to sealant, the first criteria for best tubeless valves are ones that work. For this reason, I recommend being aware of the fragility of American Classic valves. Furthermore, they probably work great in AC rims, but they aren’t optimal for other rim designs.
Not ideal: American Classic Tubeless Valve in Stan’s Alpine Rim. Photo: mechBgon
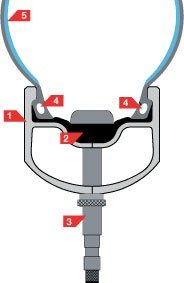
If you want the best tubeless valves, focus on a valve with round or UST-style rectangular base and an aluminium stem. This will give you the best chance of sealing in most rims, at the lightest weight. If you intend on filling your tires with tubeless sealant through the valve, make sure you buy valves with a removable core. For those looking for color options, aluminium valves allow for anodizing too, so they usually come in a range of colors. Here’s a small list of brands that sell some of the best tubeless valves on the market right now:
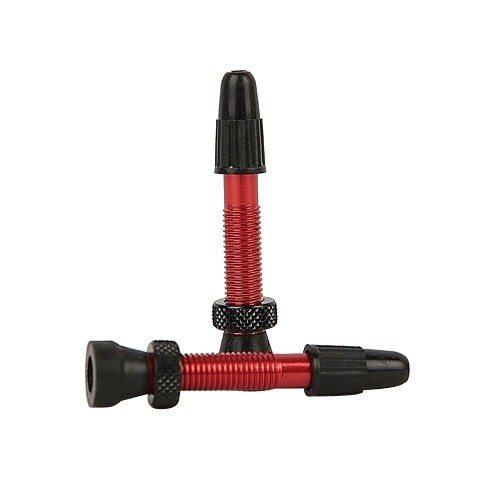
Aluminium Tubeless Valve Stem. Photo: Wistio
MTB Tubeless Conversion Kit Installation
Even with buying the best gear, some tires will simply refuse to work with some rims. Sometimes you just have to try your chosen tire on your rims and see how it goes.
Installing a tubeless kit sounds easy but can have some hassles. Be patient, every time you do it you’ll get quicker at it.
- Remove your tires and tubes from your existing wheels.
- Clean your rims if they are dirty.
- Install gorilla tape or tubeless rim tape.
- Cut a hole in the tape for the tubeless valve.
- Install your tubeless valve stem.
- Install your tire as you usually would – if you need to use levers to do this, be very careful not to punch a hole in the rim tape.
- Spread a mixture of soapy water around the bead of the tire and inner side of the rim.
- Inflate the tire as quickly as possible, aiming to seat the tire on the bead
- If you can’t inflate it quickly enough, try using an air compressor.
- If this isn’t enough, remove the valve core to get the tire seated on the bead, then add the valve core and inflate again.
- I like to leave the tire at maximum pressure for a few hours or overnight, especially if I’m running a tire with a thick rubber bead that has been folded in transport.
- Release the pressure from the tire and add sealant either through the valve core or by pulling part of the tire from the bead and scooping it into the tire.
- Inflate the wheel to a reasonable pressure and shake/spin/bounce the wheel.
- Listen for air leaks – if you hear them, move the sealant in the direction of the leak.
- Adjust air pressure and ride!
I hope this MTB Tubeless Conversion Guide has been useful to you. If you have any questions on converting to tubeless or if you think I missed something, please leave a comment or contact me on Twitter, Instagram or Facebook.


[…] for the task. Valves and rim tape is available through Spank, but I’ve heard people running ghetto tubeless conversions with Oohbah rims in the past with great […]
Step 7 calls for a soapy water around the bead and rim. Is this necessary? I’m also curious how much soapy water.
Hi BJ,
It’s not necessary, in fact I rarely need to follow this step because of the tire/rim combo I use. You can skip this step on first try and go back to it if you can’t get it to seal without the soapy water.
You are using it to help the tire “bead up” to the rim – you don’t need to use too much. A little goes a long way here.
Thanks for commenting!
I cut out a valve stem from a tube and used it once in an emergency . It was a little hard to seal at first , but after twisting a few times it sealed and has held air for several months .
nice instructions!
whay do you think most complete kit they sell also a rubber ring with a valve to make it similar to the ghetto/tube method and not with just the standard tape + valve as you describe here?